
Cables work “forever” unless cut by mistake or their contacts get exposed to moisture, corrode and stop conducting. Often people purchase cables when their shower systems is down, while something else need fixing and the new or replaced cables are discarded or gather dust unused.
We sell cables, but having the ethos and expertise we do, obliges us to share our know-how and offer a kit to help you troubleshoot, repair and replace a cable only when it is absolutely necessary. There are occasions when the data cable is not accessible and heavy damage to property is inflicted in the running of a new cable. These are the situations when using this kit could save you hundreds if not thousands. In fact any situation where the suspected culprit is the cable could be resolved faster and easier with the cable tester and kit.
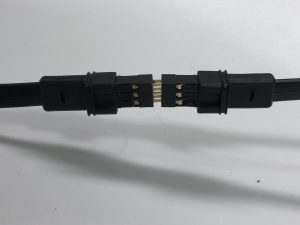
The “usual” Aqualisa cable has 6 multicores running from a RJ11 (telephone type) plug to a proprietary 6 pin connector.
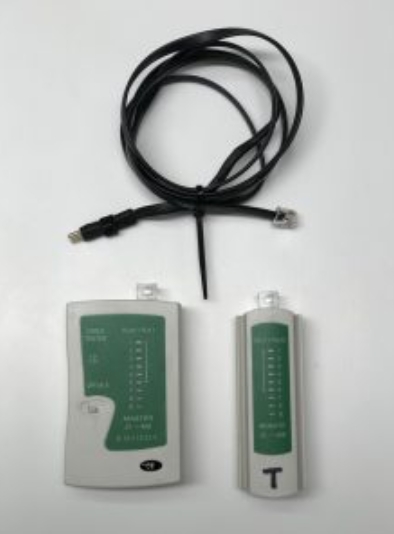
The cable tester contains two parts and an adapter cable. One part goes to one side of the cable, while the other to the other side. The adapter cable “converts” the proprietary 6 pin connector to RJ11 for the purpose of testing
Cable tester kit:
- Cable tester: Master + Remote
- Adapter cable
- Rechargeable 9V battery (micro USB chargeable, but not by USB on your computer)
When the kit is connected one needs to turn ON the Master. This will start shooting a signal through the cable and the Remote will indicate the receipt of the signal by lighting up the corresponding LED. It will cycle 1, 2, 3, 4, 5, 6, 1, 2, 3… If a wire is damaged the receiving LED will not illuminate.
Once a cable failure is apparent the cable could be repaired
The typical aging failure is corrosion to the proprietary 6 pin connector due to water ingress on the side of the control keypad within the shower. To ascertain this one needs to visually inspect the connector. Any corrosion to the control button pins could indicate a problem to the connector. The reason to look for water ingress and/or corrosion on the control button side is because the conductors on the proprietary 6 pin connector are hidden and cannot be easily inspected. You could always use a camera with high magnification
Control button side connector replacement
Proprietary plug replacement. There are different ways to replace the control button side plug (proprietary 6 pin connector) as this is not repairable. These will be listed by way of best to just acceptable, but working
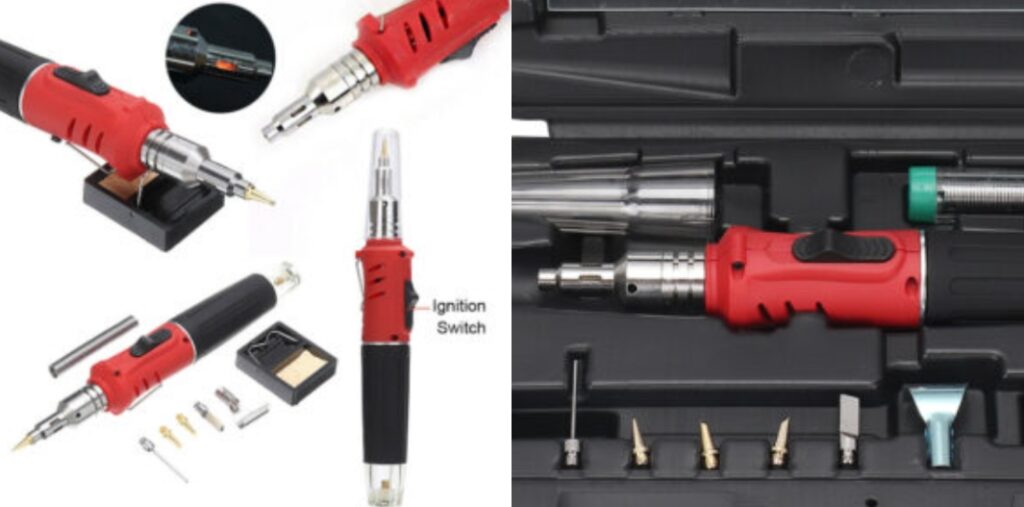
Soldering. Each core is cut allowing for sufficient length, stripped and soldered. Using heat shrink tubing will protect the soldered area from corrosion and short circuit.
The kit includes the following:
- Auto-ignition soldering iron (filled with propane)
- Solder
- Flux
- Heath shrink (3:1 adhesive glue lined)
Soldering should produce elegant repairs ideally with staggered joints, thus low cable circumference. This method requires most expertise and experience, but should be within the scope of abilities of any technically minded person
Splicing with jelly crimp connectors
The cable is cut close to the proprietary connector and the other layer carefully pealed without damage to the wires. Every wire of the existing cable should be aligned and connected with the same colour of the proprietary connector using the jelly crimps. The wires are inserted fully in and with the help of players the jelly crimp are locked into place one after another. The jelly (thick silicon grease) makes the connection waterproof and the metal insert within bites into the wires, connecting them

The kit includes: 12 jelly crimp connectors
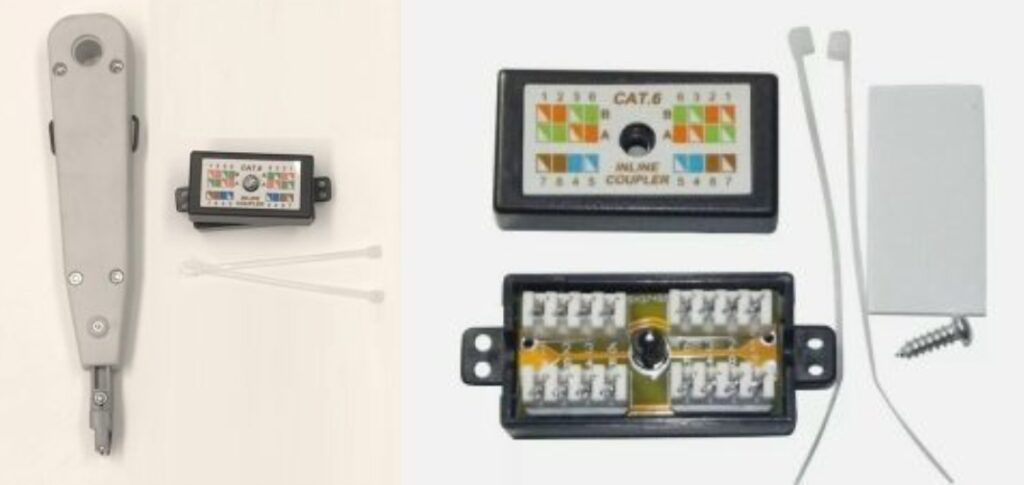
Splicing with in-line CAT coupler
Make provisions for the cable and coupler to fit in before cutting. Cut the cable and ensuring correct mapping all wires are connected with the help of the push-cut tool
The kit includes: 1 coupler and 1 push-fit and cut tool
Processor side
RJ11: The processor side of the cable terminates with RJ11 (phone) connector. This side of the cable is earlier to repair, but we have left it for last as the likelihood for failure here is minimal. If rounded to the nearest whole number the occurrences are close to Zero.
Re-termination is straight forward and you may choose to do it before you replace the proprietary cable as good measure. Usually excess cable is left on the side of the processor and you can re-terminate multiple times before you run out of cable
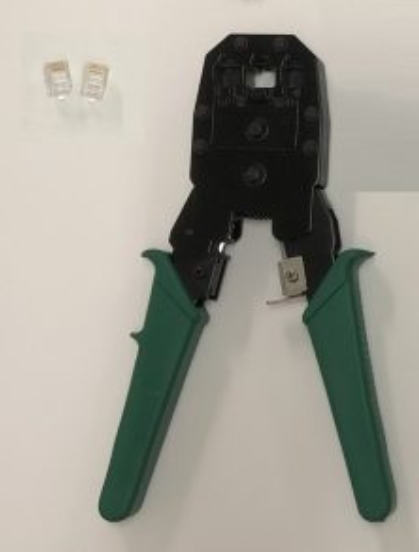
Re-terminating the RJ11
This is easily done. The cable is cut, the outer sleeve is pealed and after reinserting the cable cores into the new RJ11 connector, the last is crimped. All is done with few manipulations with the same crimping tool.
The comunication bus between the processor and the control buttons is not demanding, thus the cable twist, individual lenghts, etc. are not critical. Therefore any repair as suggested above or similar should work.
Aqualisa digital cable tester and repair kit for all cable types, including and not limited to: Quartz, Visage, Opto, Viso, Zuri, Rise, Axis, HiQu. If the cable looks like the pictures than it is suitable
The entire kit is offered under our loan scheme. You take the kit paying a deposit of £80 and when you return it back we charge you only for the parts used plus £29.99 which is our handling fee for it
Please tell us what you think of this article. What you like, dislike, how to improve it, etc.
Thanks